
I apologize for the late post. It was intended to go up earlier this evening, however, I had a small scheduling glitch. Sort of ironic given the topic of the day. ;)
Welcome to the first week of our Four Week "Wait-No-More" Organizing Challenge! I wish I had some astonishing before and after photos for you, however, I decided that this first week I needed to focus on the area where we needed the most help... time management. However, I have a feeling a few of you will be able to fill the before and after void.
I don't know what it is. I can tackle a closet and organize it down to the last shoestring, but time management? It is a whole different ball game. And with the number of ball games we attend each week... Managing time effectively is really crucial to daily success, far more so than an organized closet. It can completely impact day-to-day life, and lately it has been evident around here as our schedules and home have been a bit out of control. So much so that we are all feeling the negative results of it.
I am sure that time management is a far more personal type of organization than most things; what works well for one person may fail for someone else. Over the years I have recognized that when we have a family "hot spot" holding a cleaning checklist, calendar and schedule, we are far more in-sync than when we have nothing at all (which has been our life for the past six months). So obviously, we went back to that system this week, and it has been amazing the difference it has made with the kids already. And myself. No more need to repeat myself 5,268 times when the kids ask what chores need to be done or what we have going on each evening.
But this entire challenge ran much deeper than just popping up a calendar and schedule on our memo board. My days are an entirely different challenge. I love to work and have always been a busy body, and I haven't found that working from home causes me to want to lounge in front of the television all day. In fact, it is typically the opposite. I don't know how to stop when I get going on something. And I don't know how to look past a messy house in order to sit down and focus on my work. It always seems that when my work flourishes, my home suffers. And when my home is rockin', I am behind on my work. Although I do blog, I also run an online shop, contribute to other websites, and ultimately have long term goals for my business that I need to focus on. I don't plan to rely on a blogging/Etsy shop income long term, so it is important to remain focused on my future business goals as well.
On top of it all, I always feel like I am ten steps behind and that I don't have the time to focus on items that matter most to me. But the funny thing is, I have 16 hours in a day! 16 hours you guys! Do you know how much someone can do in 16 hours? It is amazing that not having a clear plan or focus each day allows those 16 hours to fly by, leaving me to wonder where the day went. And why I didn't go for my nightly run. Or why we don't have enough time for more fun family outings.
I think it is safe to say I have been struggling, and I was so excited to focus on taking back my days this week. It was all I could think about and I did a lot of idea jotting and analysis of how we could/should be spending our time.
I started out spilling so many thoughts on multiple pages in a notebook, I thought I would create a few printables to compile my ideas and to share with any of you looking to make changes to time management as well. It may seem like a lot of work, or silly to some, but I have to say that in just a couple days I began to notice some difference. At the same time, I know that consistency while also being flexible will ultimately be the key to long term success.
STEP 1 - DAILY TASKS
My first step in the process was to list out all of my day-to-day tasks. Everything from taking a shower to checking emails to chores and exercise. I listed the items I do without any thought each day, as well as the items I want to make sure I have time for, things like reading and running. This is not intended to be a "to-do" list. This is just to recognize reoccurring items that build your day from sun up to sun down.
STEP 2 - DAILY SCHEDULE
One of my biggest goals in this process is to get my tush in bed by 11:00 PM each weeknight. I am a night owl and super slooooow in the morning, so this is never easy. But the days I am up earlier tend to be the days I am also the most productive. Being that I never get 8 hours of sleep makes this by far the most important goal of this entire process. Starting at 7:00 AM through 11:00 PM, I began filling in the tasks I listed in Step 1. I placed tasks in the time slots that made the most sense, and made quite a few adjustments to how my day was previously laid out.
I have done this activity in the past, and it is always super enlightening! This is when I realize how hard it really should be to fill those 16 hours per day. I am able to put all of my desired daily tasks into time slots and still have a few spaces free while also getting a full 8 hours of sleep!? Knowing that makes me wonder how many hours I spend lost on my computer with little direction; checking email one minute, working on a printable the next. Oh! Hello Instagram feed! What? You blogged about that? Must read it! I forgot, I have to search Pinterest for dramatic bathroom colors. Hey! I wonder if that top comes in my size!
Please tell me it is not just me who falls down the Internet trap so easily.
By completing the daily schedule, it allowed me to fill in time to work on emails each day. When my time is up, my email will be closed until the next day. No more hitting refresh in the middle of writing a post, and no more not even checking in on emails because I never got to them. I blocked specific times of the day for my daily reoccurring tasks, and other times I just blocked with a generic "work" title (more on that in a moment).
Generally, my biggest problem is transitioning from one task to the next; knowing that I have a cut-off time and that I need to stick to my schedule. To enforce the blocked times, I set a timer on my oven. This will require me to get up and out of my seat to shut it off after each given task. I always joke with Bryan that I am glued to my chair by lunch time (gross right?), so hopefully the action of getting up to shut off a timer will also keep my body moving periodically throughout the day.
Now, of course no two days are the same. There are days with sporting events and doctor appointments and travel... The goal is just to fill out a typical day. And if baseball games are typical, maybe do a second one for those types of days. My biggest tip while doing this is to leave spots for FREE time! Do not book yourself solid throughout the day. I made sure to give myself a lunch hour, free time before dinner and more free time right before bed. Knowing I have breaks in there is already refreshing and will drive me to be more focused on specific tasks during the scheduled periods of time. Also, try to over estimate your time whenever possible. This will ensure that you can have even more free time or feel ahead of the game vs. always feeling behind.
I did two schedules; one for myself and one for the boys. I popped mine into my planner and I placed the one for the boy's up on the memo board for summer. School just got out this week, so we will have a lot of adjusting to do and the kids needed ideas for filling their days while I still try and balance working, house chores and quality family time.
STEP 3 - DAILY GOALS
As I mentioned in Step 2, while I was filling in my daily schedule there were times I blocked specific reoccurring work tasks, like working on emails, and other times I just blocked generic work shifts. This is where the time to work on my website, my shop, writing posts, evolving/growing, contributing work, etc... comes in to play. Instead of going into the week and basically winging things, I decided to fill out a general schedule for each day.
For example, our kiddos LOVE Sunday brunch so I wrote that in as an important reoccurring Sunday task. We have to grocery shop each week, so I now scheduled in a specific day to go. Friday nights should be FUN nights, so I blocked those and told myself no more working or house chores on Friday nights. When it comes to work, I picked days to write posts, and I selected days to focus on my other work tasks. Hopefully, by dividing out some of my daily tasks throughout the week vs. working on each one as I have time, I can become more efficient with each one. Each one will now receive the attention it deserves. I also plan to schedule meetings, phone calls, appointments, etc... around those blocked times.
STEP 4 - PLAN DAILY
One of the tips I read while looking into the topic of time management, was to take a few minutes at the beginning of each day to make a plan of attack. So, I included a printable for that within the kit. I typically rely on my daily planner for this, but now I have it built in to my morning routine to look at my planner, compare it to my daily schedule, and mash them together. It also allows me to take a few minutes to list a couple specific goals for the day.
STEP 5 - MONTHLY VIEW
Now that I have a teenager, I get asked on a daily basis, "Mom, what do we have going on tonight? How about this weekend?" OK, I get asked the same questions by my husband each day as well. It was time to get a visible calendar back in a central location. I transferred all family related items to the calendar from my planner, so the entire crew can see what each day holds. My kids do so much better when they know what is coming ahead of time and have a set routine, so having their chores, schedules and calendars out in the open really prevents meltdowns. There are no more surprises when I have to tell them, "No" to going to a friend's home if their chores are not done or if we already had something else on the calendar.
STEP 6 - DAILY/WEEKLY CHORES
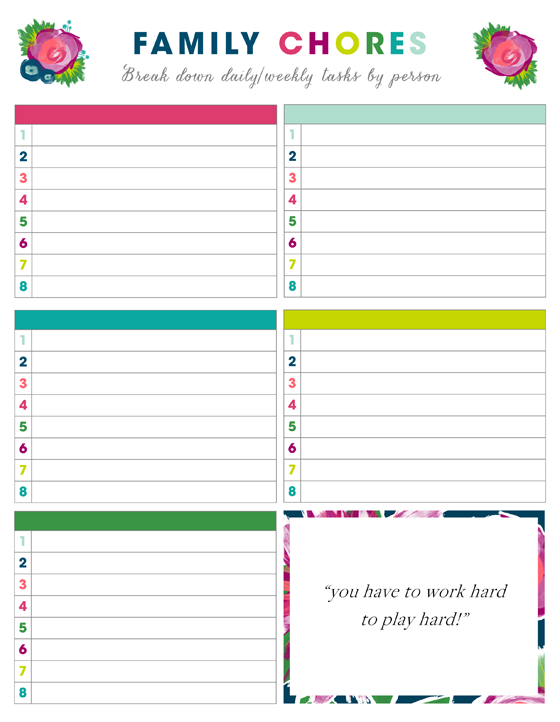
Speaking of chores... I have really slacked at holding the boys accountable to doing their daily chores. I felt this sense of mom-guilt about the destruction of our home and the impact it was also having on the boys. They still helped, but there were so many times I just found myself doing something because it was easier to keep them out of the construction mess or because the lack of main living spaces caused a trickle effect to the rest of the home. But now that things are finally back to a functional and livable state, they can pick back up where they left off. We sat down and reassigned daily house chores to each member of the family. This was a family discussion and they all felt satisfied with the chores they ended up with. My hubby laughed when he saw his list was shorter than the rest of ours (he said, "Great, now the world will think I don't do anything around the house!"), but seeing that he does most of the cooking and building, we do the rest. Team work!
So cheers to taking back our days! I know it won't make everything roses and that we will still have to be flexible, but hopefully there will be a lot more definition and awareness of how our time is spent. Mostly mine, because as much as I love working from home, it is so easy to get lost in the hours of the day. And to balance the difference between housework and work work. I hope that I can now stay focused on both my long and short term goals while also achieving a better sense of work/life balance.
Now! Who wants to win a $50 Gift Certificate to HomeGoods!? I popped in there the other day to pick up the gift, and couldn't walk out empty handed. I managed to cross a few items off of our home wish list. HomeGoods is one of the first places I turn to for storage solutions when working on organizing projects, so they seemed like the perfect fit for this week's prize. Using random.org, one link party participant will be selected to win the gift card at the end of this week's challenge! Time to share your Week 1 stories and projects with me!
I was so excited to hear how many of you were planning on participating in the weekly challenges with me! I am even more excited to see what y'all have been up to this week!
You can find all of the challenge details in this post here, and also download some FREE project planning printables to help you get started!
Have a great weekend everyone!