Monday, December 30, 2013

Herbie Lack table By: Theredone51

I’ve been trying to grow some herbs for cooking purposes but I ended up with too many kinds for the pot I had. Recently I had also upgraded some things in the living room which left me with two white Lack-tables I did not need anymore. And that’s where the ball started rolling!


What you’ll need for this hack:


  • Two Lack tables

  • Wood/plastic/Lack-legs as dividers

  • A plastic dish (to capture the excess liquid that drips through the sand)

  • Two rails (I used kitchendrawer rails)

  • Some plastic foil

  • A few screws

  • Glue

  • Soil

  • Gardening pellets


Tools you’ll need:


  • Saw

  • Marker/pen/…

  • Some kind of measurement device

  • Exacto knife

  • Drill


So to start off with, assemble one of the two Lack tabels, leave the other one unassembled. Then you take the plastic dish and take over the dimensions on the underside of the assembled table.


IMG_7462


Next you take the plastic dish, place it on the table and then take the rails to position them.


IMG_7476


As you can see the lip of the plastic dish fits nicely underneath the rails so that you can slide it out to remove the water. Next I drilled some holes in the underside to make it possible for the water to soak through.


IMG_7477


Now on to the top side of the table! I decided on using the legs of the second table as dividers. Some herbs tend to otherwise take up all the place, killing the other ones. To have the least work in cutting up the legs I opted to make the “compartment” in the tables the same length and width as the legs (40cm).


IMG_7472


Take out your marker and measurement device and transfer the desired dimensions to the top of the table.


IMG_7473


Now, take your exacto knife and carefully trace over all the lines a first time. After the first pass apply some more pressure untill the knifes goes through the table and then, still applying pressure, hack through the whole table. After all cuts are made, pry off the top layer, revealing the honeycomb structure in the table.


IMG_7475


Take out your exacto knife again and trace along the borders to cut the cardboard material. Then remove all excess material by pulling it out of the table.


IMG_7478


Now take the second table and repeat the above steps, but now on both sides of the board.


IMG_7483


Now, using your fingers, push back the core material in the top table part a few cm’s to make some room to apply glue to stick the plastic liner to the table.


IMG_7484


And there you have it, the base frame. The next step is to make a plastic liner for the inside so that when watering the wood doesn’t soak everything up. To do this I first flipped over the top table piece to get the “ugly part” on the top side. Then I put some plastic (in my case a trashcan bag) in the hole, making sure to leave enough material to cover all corners.


IMG_7485


Then, using one of the legs as a clamp/guide I cut down the excess material.


IMG_7486


Now apply some glue to the ridge we just made in the top section of the table and glue the plastic bag to the inside. Afterwards, apply glue to the bottom piece of table and on the border between the two table sections and put everything together.


IMG_7488


Almost there! Make sure to clamp the two table tops together while the glue is hardening and also to press the plastic down onto the bottom so that it remains nice and flat. This would also be a good moment to punch through the holes in the plastic so that moisture can sip through.


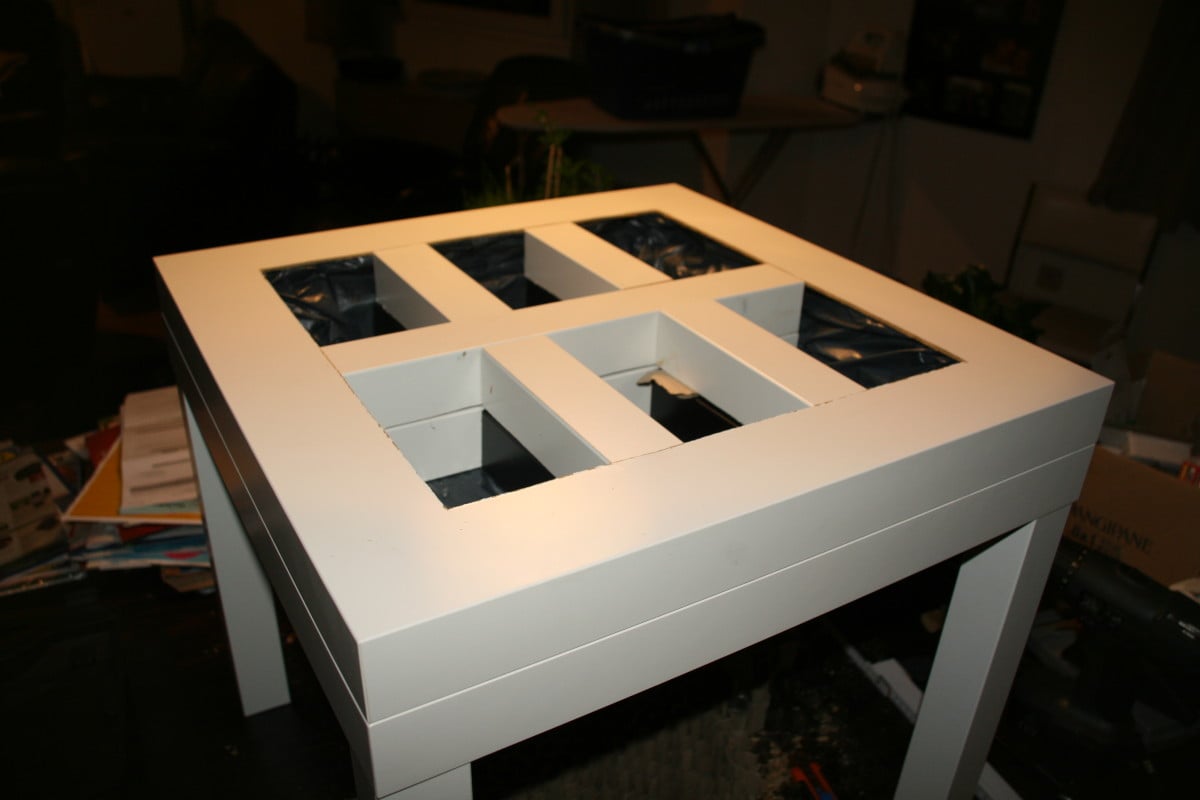
Now, making the “inside frame”. I started of with one whole leg in the middle of the bottom table and two other legs cut in half.


IMG_7491


Then, on to the top part of the inside frame. Because the legs are almost the same height as the table tops it’s not clean to just place two legs on top of each other as that way the inside frame would protrude from the table. Therefore I cut off one of the sides to reduce the height.


IMG_7492


This way, the legs line up perfectly with the top side of the table.


IMG_7493


IMG_7495


Repeat this step with the other pieces to finish of the inside frame.

IMG_7497


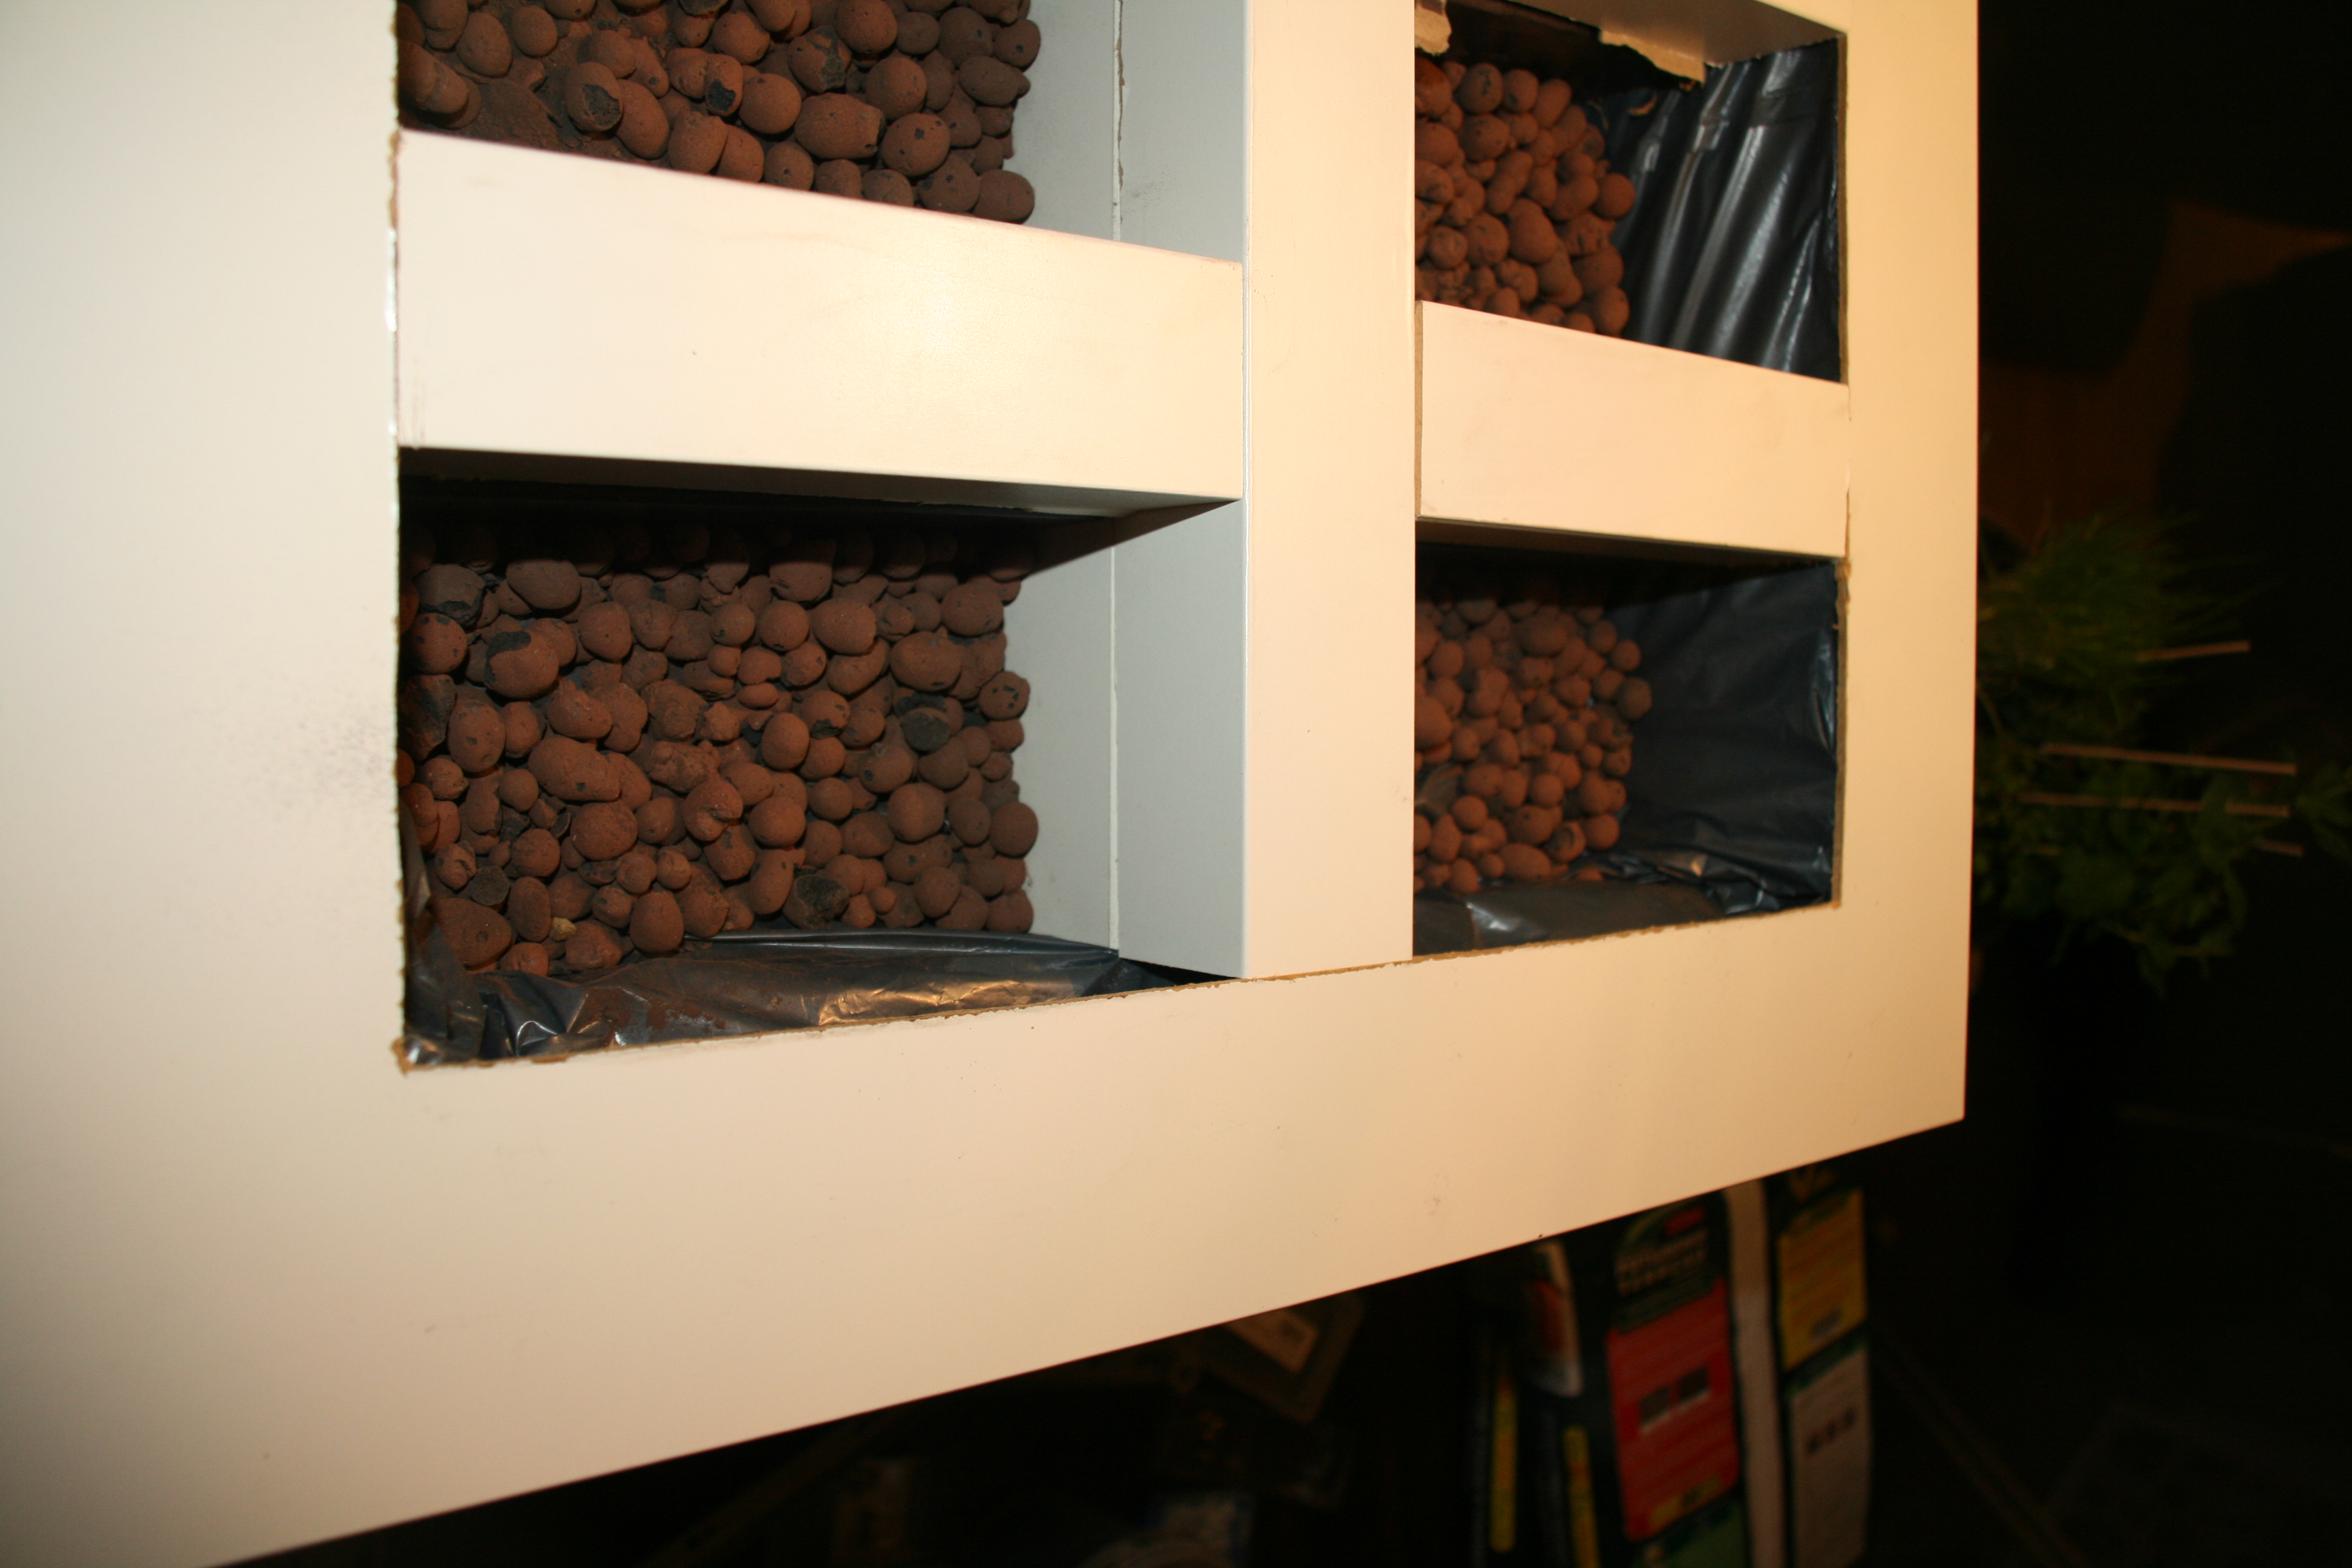
Now on to the gardening part! I chose to use pellets as the bottom layer for the plants. These are great for water disposal and make it way easier to remain the right moisture levels in the “pots”.

IMG_7499


Now place garden soil in the “pots”. I used a special kind ideally suited for herbs. Now put your seeds/plants/… in the soil, top off with more soil until satisfied and there you have it:


IMG_7500


Your Herbie Lack table! Place in the sun, water when needed and enjoy fresh herbs while cooking!


IMG_7502


via IKEA Hackers http://feedproxy.google.com/~r/Ikeahacker/~3/Gub9mCEFrwo/herbie-lack-table-2.html From Theredone51

Fabian wall shelf becomes a custom shelving unit By: Daniel

GetInline-5 fabian-wall-shelf__28194_PE075611_S4


After searching high and low for a shelving unit that would suit my needs, I decided on Ikea’s “Fabian” wall shelf. For $7.99 you get a solid pine shelf and brackets. I planned on utilizing these as bookshelves, and I wanted them to be more stable. I ended up going to a lumber store and found a beautiful piece of rift-cut oak (it has a clean, striped appearance). They were happy to cut it for me.


Since I was mounting it on the same wall as a mirror of approximately the same size I wanted for the shelf unit, I decided to use those exact dimensions. I then stained the pieces with minwax tintable stain (I had it mixed at a Sherwin Williams store). I used 3″ cabinet screws to mount the panel to the wall, directly into 2 studs (I used painters tape to mark the studs above the panel, and just measured for each screw , and it worked great.


For a clean look I placed the screws where the shelves would later go, so they would cover them up. The last step was mounting the shelves using 1″ wood screws. This whole project cost about $80, but I think the final product looks very polished and unique.


via IKEA Hackers http://feedproxy.google.com/~r/Ikeahacker/~3/jt41wHG32bA/fabian-wall-shelf-becomes-a-custom-shelving-unit.html From Daniel

Friday, December 27, 2013

Kitchen cabinets into pimped out storage catch all By: Valerie

I needed something to hold my clutter so I took 2 Ikea kitchen wall cabinets and placed them on a Lillangen base.


I then dressed them up in recycled timber. I just took old timber, nailed them onto thin mdf boards and screwed them onto the cabinets. I also sprayed the boards with a clear gloss paint.

Easy peasy!


image image image image image


via IKEA Hackers http://feedproxy.google.com/~r/Ikeahacker/~3/33SwFS1mS5I/kitchen-cabinets-into-pimped-out-storage-catch-all.html From Valerie

Easy Backsplash By: Anna

Kitchen After


So we redid our kitchen about 2 years ago, but we only put up one line of kitchen tiles (because the store had only one box at the time) and we said that when we have time we would put the rest up…(Lol) 2 years later… that never happened.


Kitchen before


Due to the fact that I get bored of things very quickly I thought I might DIY it.


Yesterday, I started painting and thought I would paint some flowers or shapes… but who am I kidding… I can’t draw even if my life counted on it….


I got so frustrated about it, I just left it and said “I’ll do it in the next 2 years”.

Got up this morning, and as I was having a cup of coffee, I saw my place mats… IDEA!!! Off to Ikea I go…

I found these striped black and silver place mats which were perfect (and only for 0.99 euro!!!)


What I did was to get the place mats (Total of 10 for my kitchen) and cut them down to the exact size of the space between the tiles and the upper cabins, and stuck double sided the tape (you can also use a glue gun or silicone) on the back and onto the wall.


And here we have the finished project! Hope you like!!!


Kitchen siply's


It’s so easy, no tiles, no mess, no fuss and it only took me an hour to do.


The best 3 things about this Hack:

1. It’s Cheap!!! (each mat cost 0.99 euro at Ikea and I already had the tape and the scissors) Total cost: 9.90 Euro.

2. Very easy to clean… chuck them into the dish washer and stick them back on the wall (you can’t do that with tiles can you???)

3. If and when I get bored of the pattern or colors, just make a quick visit to Ikea and get new place mats.


via IKEA Hackers http://feedproxy.google.com/~r/Ikeahacker/~3/NqdEVX3ZPsM/easy-backsplash.html From Anna

DIY Cat Apartment, Storage and Play Area By: David J Wu

photo 2


Hi! This is my Ikea Hack inspired 100% Ikea Cat apartment for my 2x Japanese Bob Tail Kittens.


Items are as follows

EXPEDIT 2×4 = 1

EXPEDIT 2×2 = 1

EXPEDIT 1×1 = 2 (used as steps, 2 panels ea)

EXPEDIT cupboard doors Green = x2

LACK 1×1 Shelf = 2 (2 spare, will mount on wall )

Ikea Rug (Seasonal, green in Xmas display section) = 7


Cat Scratch Post =

Lack Table Leg = 3 screwed together with provided screw

Base is Lack Table with bored hole = 1

+ Sissal Rope

Top is 2x NYTTJA Frames glued together + carpet


All items are “placed adjacent” to one another. The buckles that come with EXPEDIT is used as L brackets to secure to wall and one another.


via IKEA Hackers http://feedproxy.google.com/~r/Ikeahacker/~3/ehHU7GD2D-Y/diy-cat-apartment-storage-and-play-area-3.html From David J Wu